0.依存関係のあるBundleのjarファイルをEclipseに追加しておく
(これをEclipseの中でどうやるのかわからなかったので無理矢理な解決法です.誰か正攻法があれば教えてください.自分でExample2のプロジェクトをつくって,Package Explorer中でOpenしてある場合はそれはそのまま参照されています.)
Example3はExample2を利用します.Example2で定義してあるInterfaceを利用しているのでExample2のjarをEclipseが見えるようにしておきまます.
jarファイル: http://y30.net/pg/plugins/osgis/tutorial.Example_2_1.0.0.jar
これをEclipseのpluginsフォルダに放り込んでおきます.
で,起動.
1.Projectを作成
New/'Project' を選択(Java Projectじゃないよ)
Wizerdの選択にてPlug-in Projectを選択.
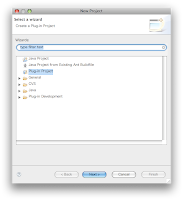 (画像はexample1の時を流用しているので1->3と読み直してください)
Dialogに入力
Project name: tutorial.example3
Target Platform: an OSGi framework standard
(ほかそのまま)
Nextを押す.
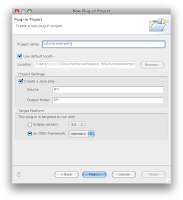
#(OSGi framework standardが選べればEclipse 3.2でも良いはずです)
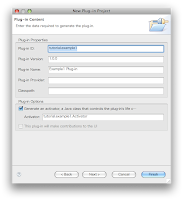
'Plug-in Content'のDialogとなる.
Finishを押す.
2.プロジェクトに依存するtutorial.Example_2 Bundleを指定しておく.
Plug-in Manifest Editorを使ってbuildする.
このEditor, META-INF/MANIFEST.MFをクリックすると立ち上がる.(プロジェクトができた時も立ち上がってる.)
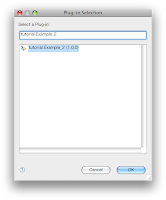
左から2番目のタブ'Dependencies'にある'Required Plug-ins'で'Add...'ボタンを押す.
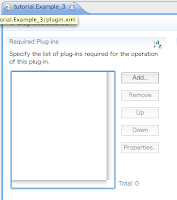
でてきたDialogから'tutorial.Example_2'を選ぶ(もしくはフィールドに入力する).
これは0.で入れてないと(もしくはExample_2をプロジェクトとして持っていないと見えない.)
保存することを忘れずに.
3.Activator.javaの編集
src/example/tutorial3/Activator.javaにここのコードを書き写す.
ただし以下の部分が改造部.
- 改造内容
- sample.FelixApplicationはコンソールがないためDialogで処理するように改造
- tutorial2, 2bと複数登録した場合に両方利用した結果を返すように改造
- 改造前 1
     System.out.print("Enter word: ");
word = in.readLine();- 改造後 1
word = JOptionPane.showInputDialog("Enter word: ");JOptionPaneを使うのでswingのサンプル- 改造前 2
     // First, get a dictionary service and then check
      // if the word is correct.
     DictionaryService dictionary =
          (DictionaryService) context.getService(refs[0]);
     if (dictionary.checkWord(word))
     {
          System.out.println("Correct.");
     }
     else
     {
          System.out.println("Incorrect.");
     }

     // Unget the dictionary service.
context.ungetService(refs[0]);- 改造後 2
     String msg = "";
     for (int i = 0; i < refs.length; i++) {
      ServiceReference sr = refs[i];
      DictionaryService dictionary = (DictionaryService) context
        .getService(sr);
      String lang = (String) sr.getProperty("Language");
      if (msg.length() != 0) {
       msg += "\n";
      }
      msg += lang;
      if (dictionary.checkWord(word)) {
       msg += ": Correct.";
      } else {
       msg += ": Incorrect.";
      }
      context.ungetService(sr);
     }
     JOptionPane.showMessageDialog(null, msg);
4.Plug-in Manifest Editorを使ってbuildする.
このEditor, META-INF/MANIFEST.MFをクリックすると立ち上がる.(プロジェクトができた時も立ち上がってる.)
4.1ビルドの前にswingパッケージをImport対象として指定する.
左から2番目のタブ'Dependencies'にある'Imported Packages'で'Add...'ボタンを押す.
でてきたDialogから'javax.swing'を選ぶ(もしくはフィールドに入力する).

4.2ビルド
一番左のタブ'Overview'にあるExportingの3項目
'3. Export the plug-in in a format suitable for deployment using the(?) Export Wizard'をクリック(Export Wizard部分)
で,Deployable Plugin-ins and fragmentsダイアログがでる.
DestinationタブのDirectoryを選択しテキトーな場所(ディレクトリ)を指定.(以降ここを${DIRECTORY}と呼ぶ)
Finishを押す.
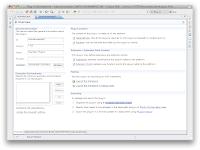
${DIRECTORY}/plugins/tutorial.example3_1.0.0.jarが出来上がる.
0 件のコメント:
コメントを投稿